Category: Art & Creativity

Explore imaginative works and artistic experiments — chalkboard animations, stop-motion shorts, and the occasional quirky sketch. It’s the place where creativity runs wild and weird.

  • Painted Denim Mash-up

    Painted Denim Mash-up

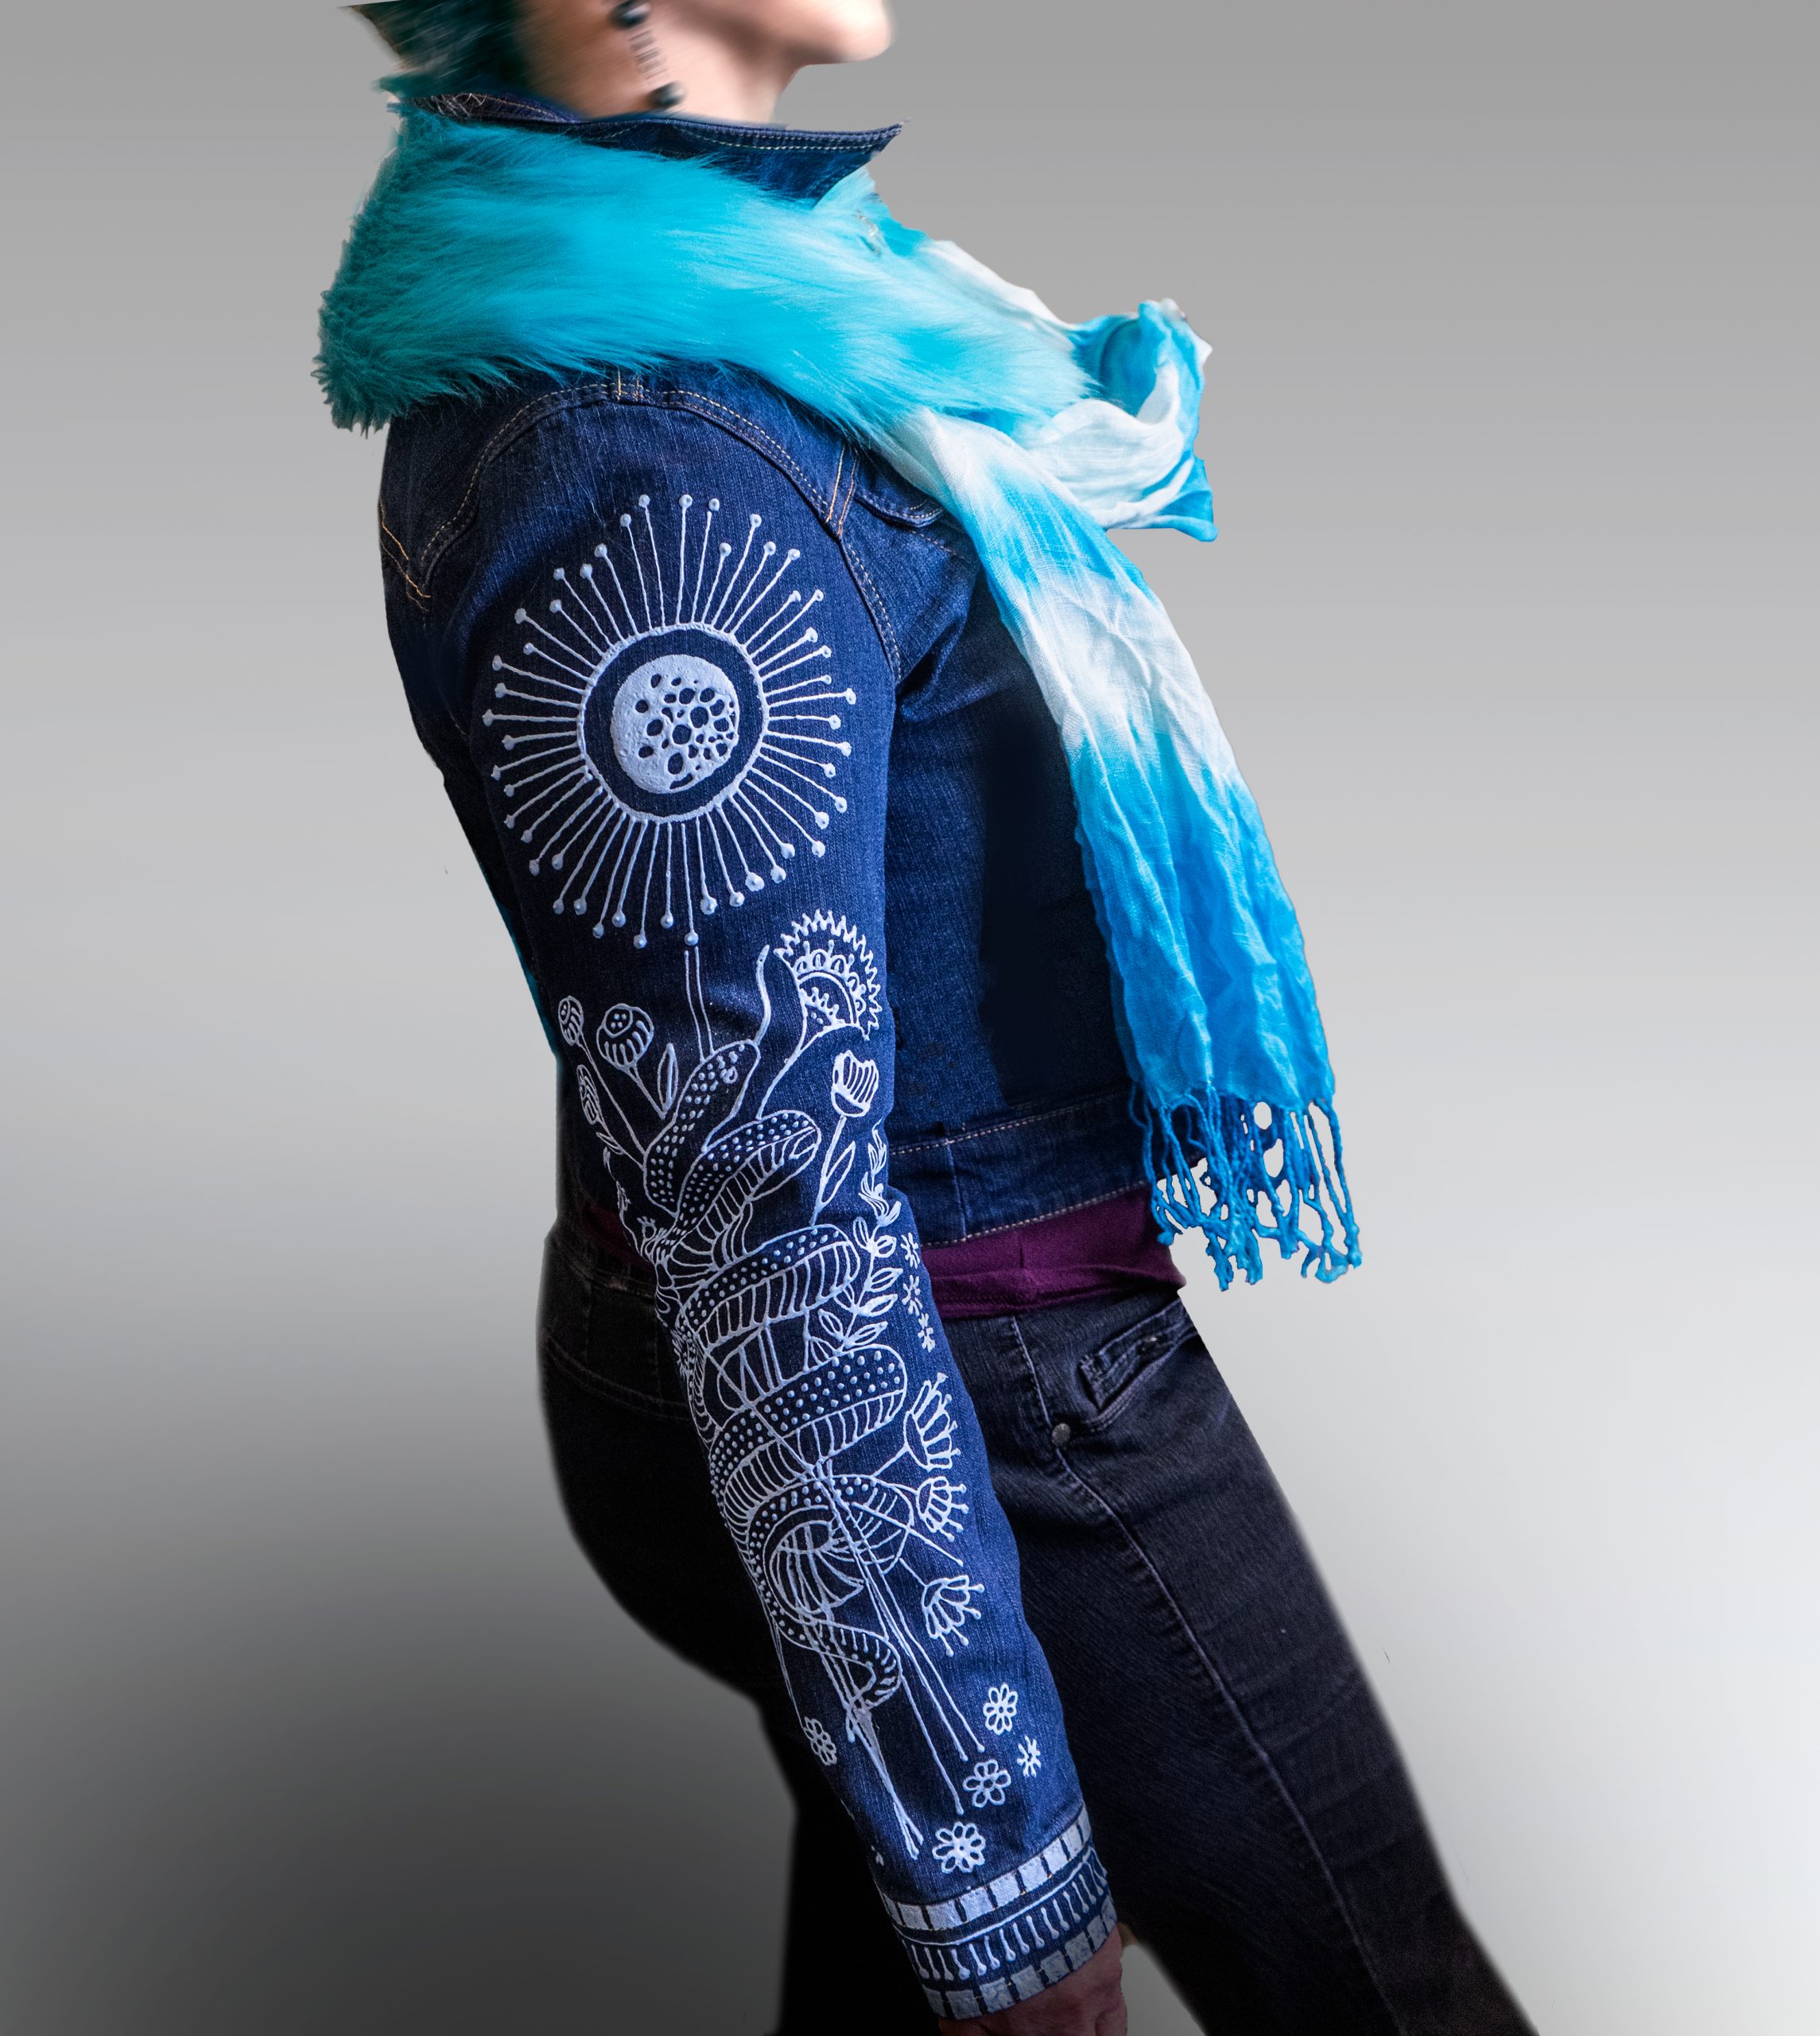
    My Fashion Relationship: It’s Complicated

    One single style doesn’t usually do it for me. I dig mashing-up fashions like Funky + Fabulous, Mariachi + Tres Chic, Astro + Artsy. Creating Cowboy Kimonos allows me to marry unlikely fashion trends that shout, “I’m an original!” Got a dream mash-up? Create your own using the Mash-up Generator.

    Painted denim custom mash-ups

    Mash-up Generator

    Mix & Match the styles below to make a Mash-up. Don’t know the style? Click the links! (From Sew Guide, Fashion Styles: 40 Types)

    Ready to Make Your Mash-up into a Custom Painted Denim Jacket?

    1. SHARE your style mash-up with me and I’ll create a sketch.
    2. LIST your likes and dislikes, then I’ll tweak the sketch until we agree on a final design
    3. TALK COIN. Price is determined by what parts of the jacket are painted, how detailed the design is, and high or low paint coverage. I’ll prepare a quote and begin painting once we agree on price and payment.
    4. PAINT happens. Once complete, the jacket will dry for 24 hours before it ships.
    5. SHIP and SHARE. Once you get your custom Cowboy Kimono, show it off, take a pic and I’ll post it!
  • Cactus Patch Mail Art

    Cactus Patch Mail Art

    A finished Cactus Patch Mail Art. Displaying a vibrant hand drawn cactus plant.
    Cactus Patch Mail Art

    What You’ll need to create this Cactus Patch Mail Art Masterpiece for Yourself:

    Supplies

    • Envelope
    • Studio Series Alcohol Dual-Tip Marker Set (available at Pennysmiths Paper)
    • Uniball Signo White Pen, Broad (available at Pennysmiths Paper)
    • 1 sheet heavyweight paper, cut to fit inside the envelope
    • 1 sheet heavyweight paper, to protect the surface where you are working
    • Post-it Notes
    • Mailing Label (optional)

    Cactus Patch Art How-To:

    Steps

    1. Start by placing post-it notes on the front of the envelope over the address area to keep it the same color as the envelope.
    2. Insert a cut sheet of heavyweight paper inside the envelope to keep the markers from bleeding onto the backside.
    3. Select 3-4 harmonious colors (these would be next to each other on the color wheel or all the same color family). Blues or greens work well. Go a bit wilder by using orange, yellow and red or purple, red and blue.
      • Using the brush end of the pen, make an inverted “U” that flares out a bit at the bottom.
      • Grab another color and draw a stripe just to the right of your first line. The stripes can touch or overlap on the edge. Let the stripe get wider as you move towards the bottom.
      • Repeat until the “U” shape is filled with stripes of color. 
      • Using the fine tip in the same color as your original U-shape, dot the outside to create needles.
      • Repeat the above steps next to your original U-shape, but make this one smaller in size and overlap it a bit. This will create the illusion of depth. 
      • Continue making different sizes and overlapping until the bottom 2/3 of the envelope is covered.
    4. Pick two harmonious colors for the blossoms. Using the fine tip, make clusters of upside-down teardrop shapes along the top each cactus.
    5. Select one of the lightest markers and use the fine tip to draw lines for the sky.
    6. Use your white Signo pen and marker’s fine tips to draw different patterns lining the cactus stripes. If you need some pattern ideas, check out the black and white handout (below). 
    7. With the white Signo pen, add needles to the edges.
    8. Finally, draw concentric teardrop lines inside the cactus blossoms using the white Signo pen.
    9. Remove post-it masks. Cover address area with a mailing label for cleaner edges (optional)
    10. You can play with the design even more by:
      • Mixing-in different types of cactus – add a barrel cactus or prickly pear.
      • Create a sea life version with coral, starfish, and seaweed. 
      • Finish the envelope by lining it with colorful paper. Envelope liner templates are available at Pennysmiths Paper.

    Black and White Handout

    Looking for more inspiration?

    1. Pinterest: Search Mail Art or Envelope Art
    2. Zentangles : https://craftwhack.com/how-to-zentangle
    3. YouTube: Search Alcohol Marker videos
    4. Link to the time-lapse video (below) of this technique: Cactus Mail Art

  • Mail Art

    Mail Art

    Bambino Mail Art

    My Mom was a mail magician. She would make letters appear a few days into my week of summer camp. I’m not sure if she wrote them the moment after she dropped me off or if she had them written before I left. Even though I was only away from home for seven days, the letters usually hit when my homesickness kicked in. Her distinctive cursive and stories about all that was going on at home included weather reports, updates on my five siblings, Dad’s doings and tales about the family dog.

    In this season of summer camp adventures and family travels, my mother’s letters are a springboard for this elevated envelope project. Hopefully, the writer will enjoy marking and coloring as much as the recipient digs the arty envelope!

    One colorful cactus-themed envelope in timelapse appears below. (ta-da!)

  • Painted Portrait Jacket

    Painted Portrait Jacket

    Just delivered this freshly painted, Cowboy Kimono, to a dear friend and creative supporter. She commissioned the project as a present to herself and wanted something as vibrant as her personality. The few simple asks included maintaining the glory of her silver hair (she earned every strand and it’s a source of pride). Her response to the preliminary sketch was an enthusiastic, “Go for it.” (Love that form of creative cheerleading)

    Interested in a custom Cowboy Kimono? Let’s talk!

  • Sneezing Geisha Overhaul

    Sneezing Geisha Overhaul


    The Sneezing Geisha has been Cowboy Kimono’s icon for decades, revised and updated every few years. The last logo version was a scourge from the get-go. Reflecting back, I can see that over-thinking and settling on logic-based design is partly responsible for its glitches. My intention to make a more dynamic graphic by tilting everything created an imbalance that was a challenge to use in layouts. The logo is further skewed by the use of solid and outlined type.

    Overhauling Sneezing Geisha was more of a playdate than a serious, focused design session, resulting in a better representation of Cowboy Kimono’s aesthetic. The Geisha’s shape, expression, and flower stayed the same, while the colors, patterns, linework, and fonts were updated.

    KonTiki Aloha Font

    The updated logo works well in a variety of layouts, is easy to center and makes me smile.

  • Rocker, Raver, or Funky Cowgirl?

    Rocker, Raver, or Funky Cowgirl?

    A hand painted Cowboy Kimono + faux fur collar + thrift store scarf = THREE-IN-ONE Fashion. Perfect if you like to dress for your current mood.

    I’ve been finding used denim jackets and converting them into Cowboy Kimonos for years. This year I wanted to collaborate with my oldest son who sews faux fur vests and hoodies. Together we made this neon turquoise faux fur collar.

    Fur Collar with Scarf

    Check-out the underside…there are loops to hold a scarf in place!

    The three elements can be combined for different looks.

    Both sleeves of the Cowboy Kimono are hand-painted with dimensional fabric paint.

    Sleeve detail

    This original, three-in-one outfit is now available for purchase.

  • Flattering Caricatures for a Salon Brand Mascot

    Flattering Caricatures for a Salon Brand Mascot

    Caricatures to match salon’s brand

    A longtime client asked me to create a series of caricatures for her salon. The salon’s logo includes a mascot that is a simple vector illustration. This versatile mascot has been disassembled, worn slippers and a towel, driven a truck, somersaulted, had a male twin, and more. The salon nicknamed her, Audrey.

    Pieces of Audrey

    Audrey was the inspiration for the caricature style. The hair stylist and nail technician’s each have a different color for their business cards. The colors used in the caricatures match their business cards. I took photos of each subject and developed their caricatures in Illustrator. Below are four examples.

    Annette
    Vector caricature of Annette - salon branding
    Elaine
    Amorena

    Vector caricature of Amorena - salon branding

    Jackie

    Vector caricature of Jackie - salon branding

    This graphic style ended up being very a flattering way to shine the light on their fabulous hairstyles.