Tag: tutorial

Instructional posts with clear how-to steps for making, styling, or building something awesome.

  • DIY Fish Ornaments Stuffed with Recycled Paper

    DIY Fish Ornaments Stuffed with Recycled Paper


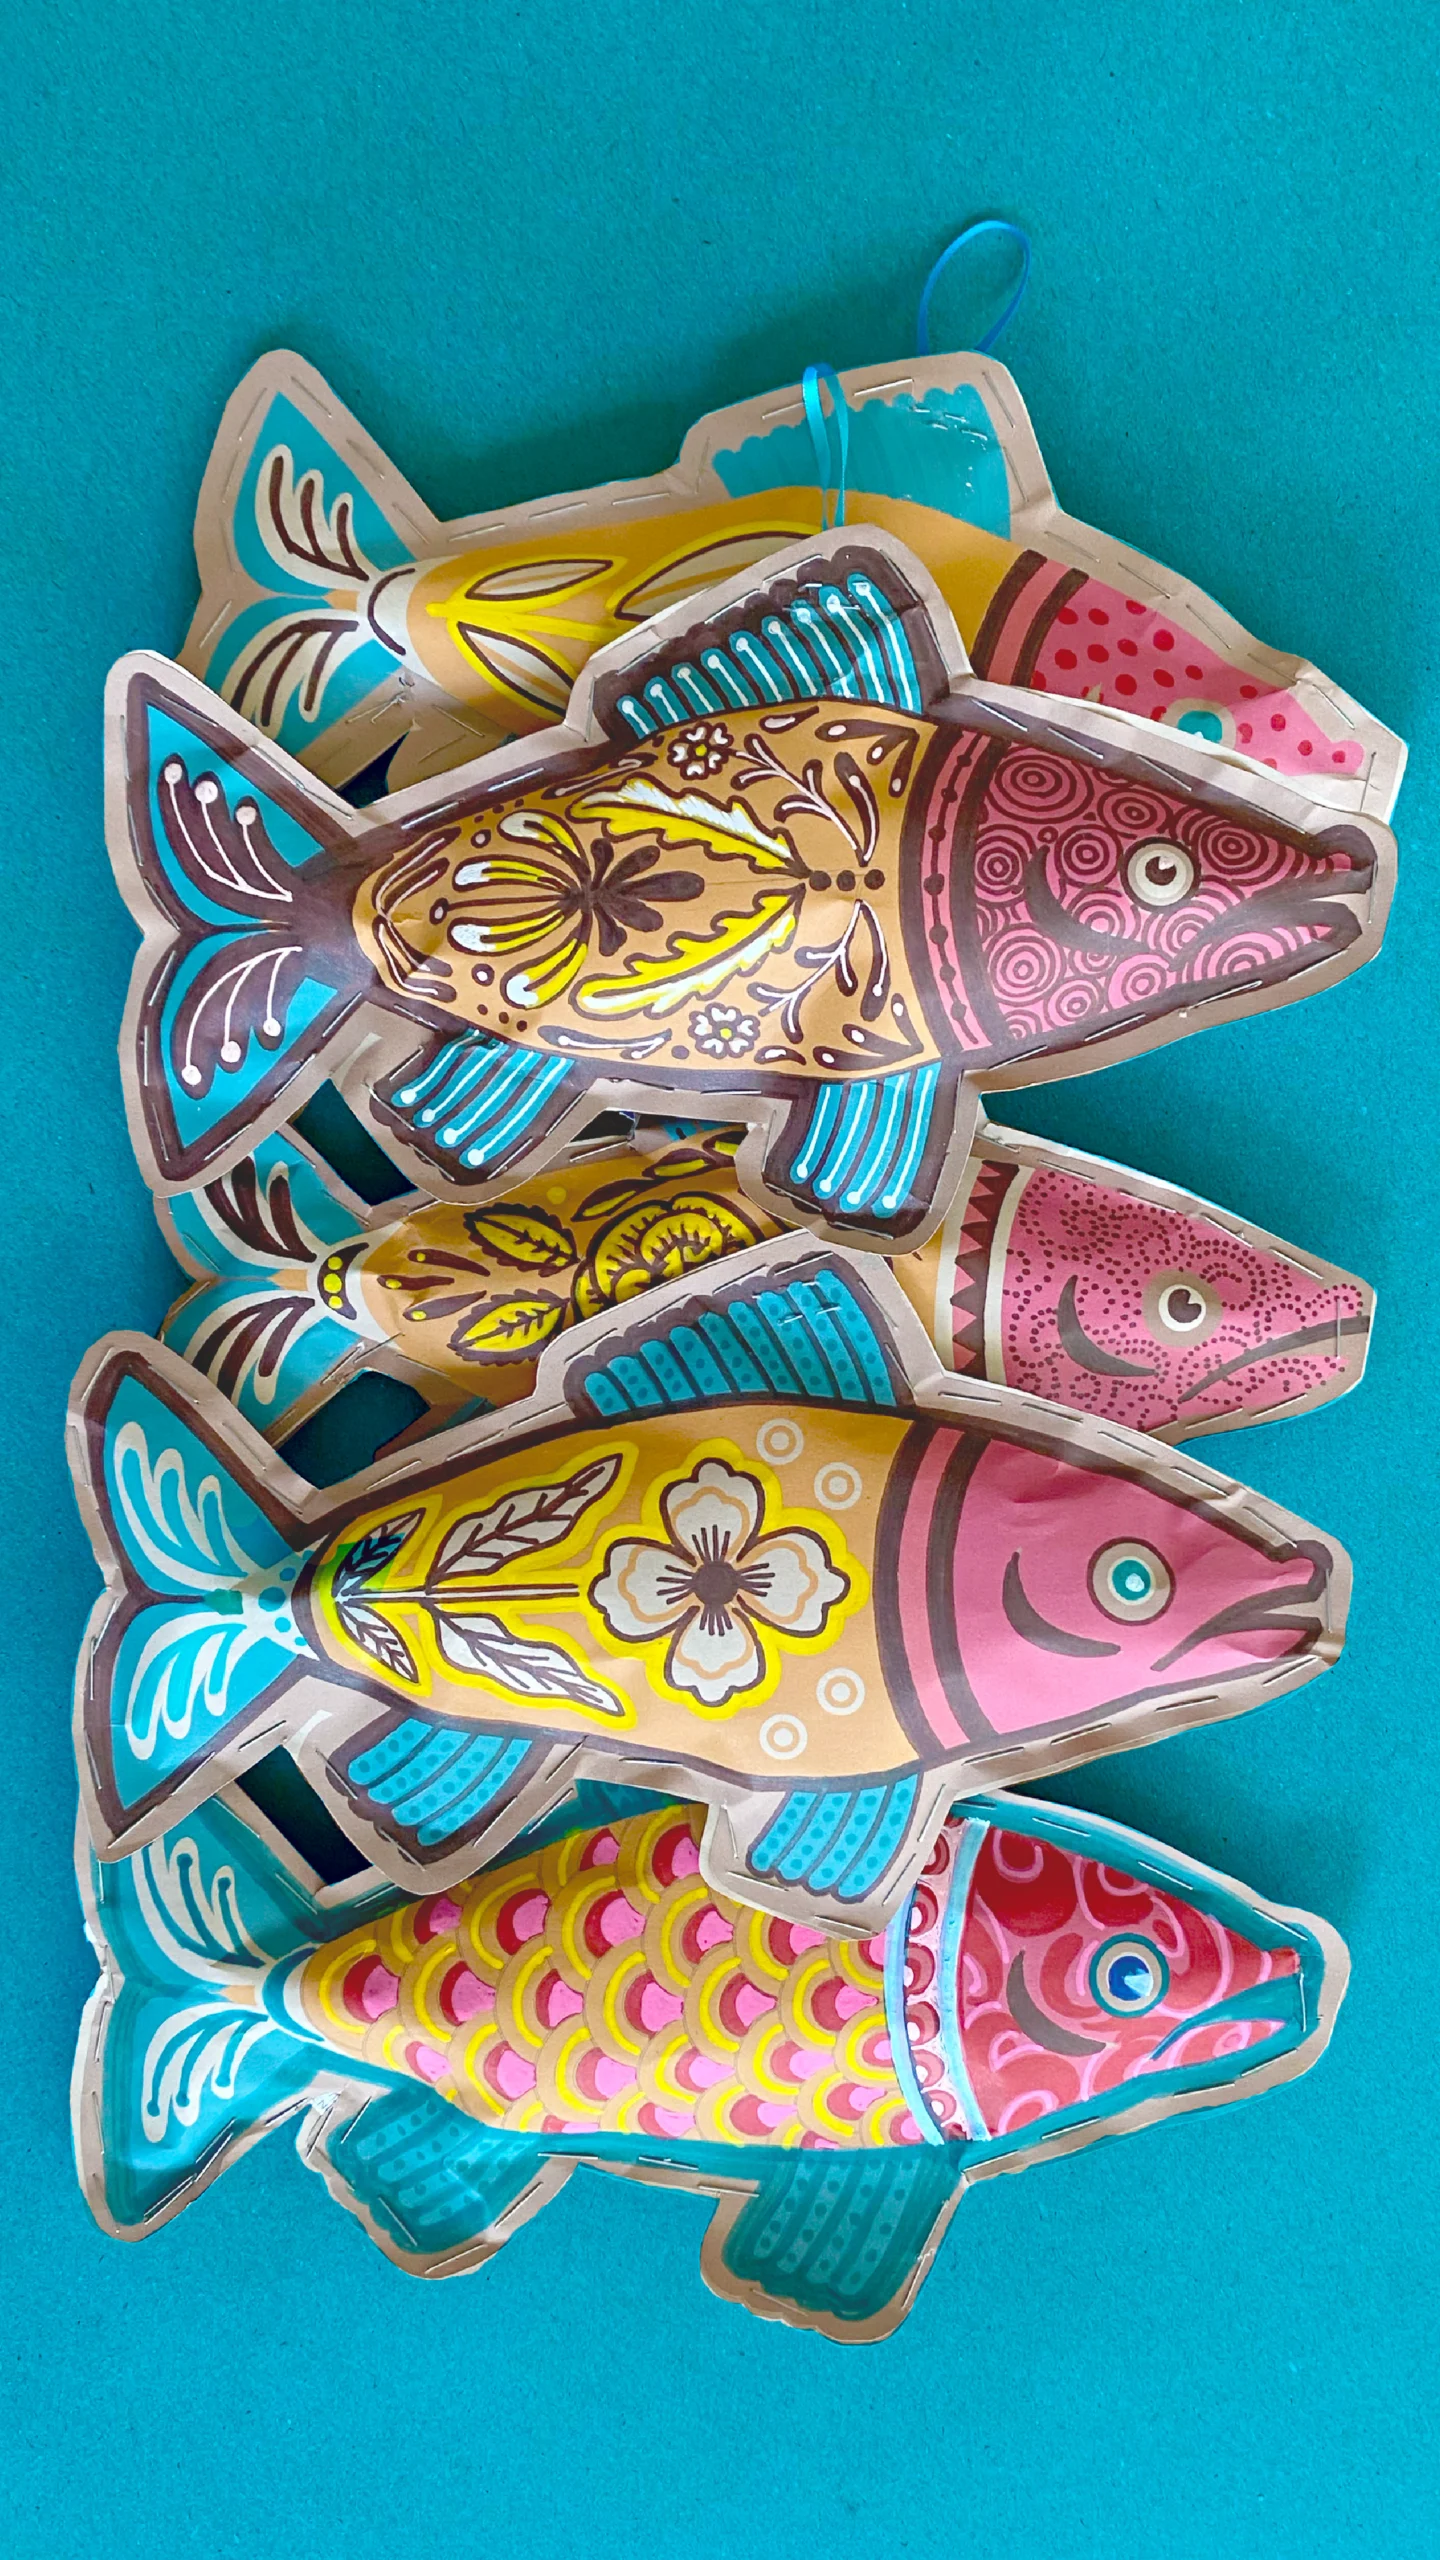
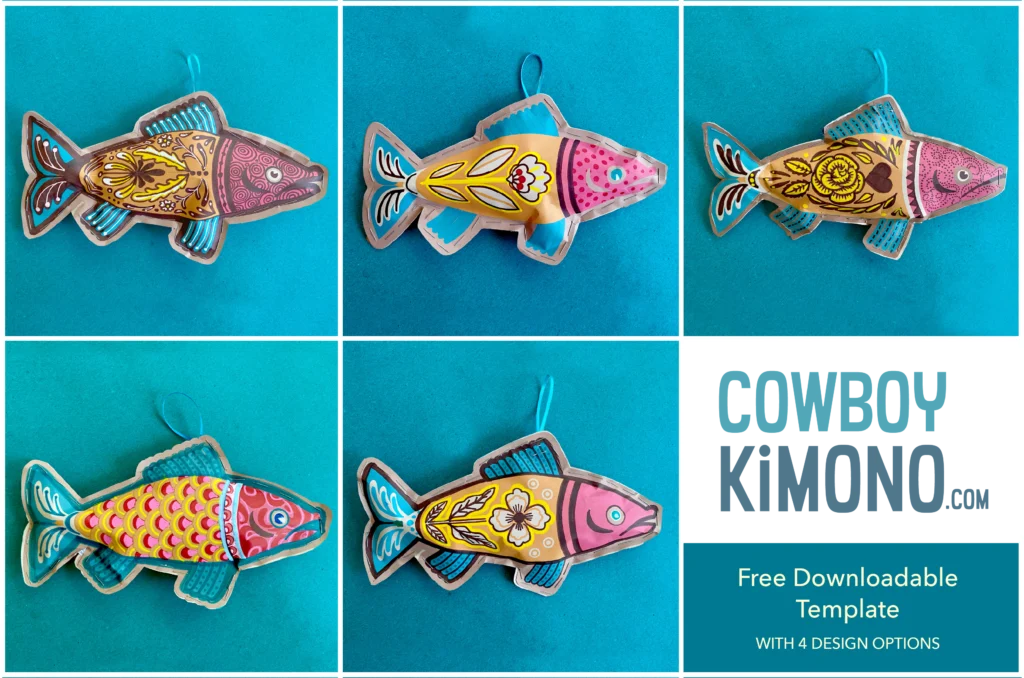
    Shredded docs → sassy fish. 🐟 Reel In the Craft of the Day!

    If your living room tree is more “ever-delightful” than “evergreen,” these Kraft Paper Fish Ornaments are a playful way to keep it dressed up between holidays. They’re eco-friendly, easy to make, and give you an excuse to break out the crayons, paints, and markers like a kid again. Bonus? This recycled craft adds some serious charm to your earthy, year-round tree.

    Colorful Kraft paper fish with various designs.

    Supplies You’ll Need

    Directions

    1. Download & Print
      Grab the fish template and print it on letter-size Kraft paper.
    2. Double It Up
      Place a blank sheet of Kraft paper behind each printed design. Hold both sheets together and cut out your fish shape. (Keep each cut-out pair together!)
    3. Decorate
      Color, paint, or doodle your heart out on one side of each fish.
    4. Staple & Stuff
      Lay the decorated fish on top of its blank twin. Staple halfway around the edge so it looks like cute little stitches. Leave an opening, then stuff it with shredded paper. Tuck in any strays.
    5. Add the Hanger
      Cut 5-inch ribbons, knot them into loops, and staple one to the back of each fish at the top fin.
    6. Close It Up
      Finish stapling around the fish to seal it in. Done!

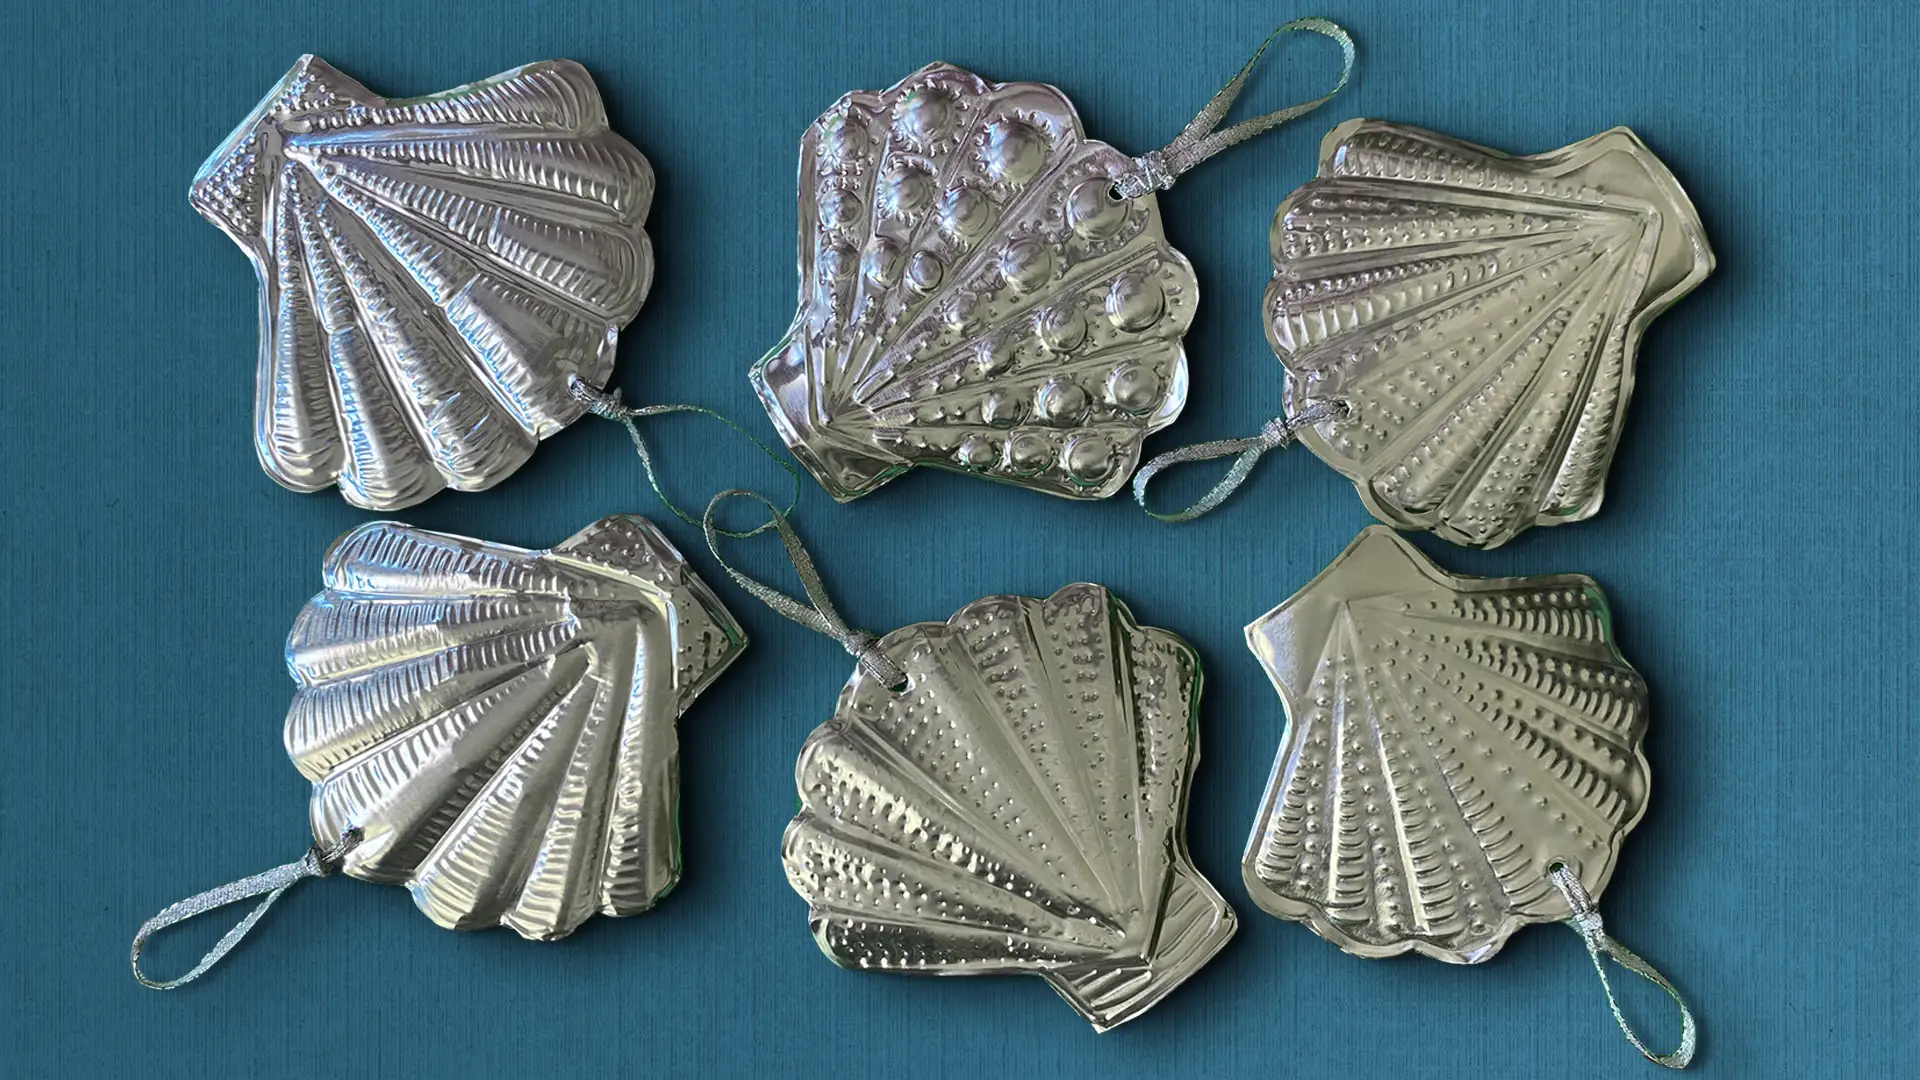
    Pro Tip: Try this same method with my other templates—birds, bugs, shells, starfish, or milagros. Mix them together for a whimsical, garden-of-delights tree that feels alive all year long.


  • DIY Sunburst Chairs: Hand-Painted Upholstery with an Ethnic Chic Twist

    DIY Sunburst Chairs: Hand-Painted Upholstery with an Ethnic Chic Twist

    Sometimes the perfect upholstery pattern just doesn’t exist on a fabric bolt—you have to make it yourself. That’s exactly what I did with these mid-century modern dining chairs. Inspired by the layered, global vibe of Ethnic Chic—a style that blends cultures, textures, and traditions into one “well-traveled” look—I decided to hand-paint my own bold sunburst motif. The result? A fresh, personal update that feels both modern and timeless, and a project anyone can tackle with a little creativity and patience.

    Upholstered seat and seat back before and after hand painting.
    Upholstered seat and seat back before and after hand painting sunburst pattern

    How to Paint Your Own Upholstery Pattern

    Supplies You’ll Need:

    • Dining chairs (or any upholstered seat with removable cushions)
    • Screwdriver (to remove seat + seat back)
    • Wax paper + inkjet printer
    • Computer design program (or a printed pattern you love)
    • Fabric paint + small paintbrushes
    • Damp cloth

    Steps:

    1. Prep your chair
      Unscrew the seat and seat back to make painting easier.
    2. Create your pattern
      Design your motif on the computer (I went with a circular, sunburst-style pattern). Convert it to a bold outline in the color you’d like—reddish-brown worked beautifully on my cream fabric.
    3. Transfer the design
      Print the pattern onto wax paper with your inkjet printer. Lay the print ink-side down on the fabric and rub the backside to transfer the design. Wax Paper Ink Jet Transfer Tutorial
    4. Paint the pattern
      Use fabric paint and a stiff brush to carefully go over your transferred lines. Don’t rush—steady brushstrokes will make your design pop.
    5. Clean it up
      Once the paint is completely dry, gently wipe away any leftover transfer marks with a damp cloth.
    6. Reassemble your chair
      Screw the seat and seat back into place, and admire your one-of-a-kind creation!
    Dining chairs with hand painted sunburst pattern
  • Shell Yeah, My Tree’s Still Up.

    Shell Yeah, My Tree’s Still Up.

    How to Make Metal Embossed Seashells and Starfish Ornaments

    Yep, you read that right-I keep a tree in my living room year-round, and instead of packing it away after December, I just keep dressing it up with whatever makes me smile. Birds, flowers, seashells, starfish—you name it, it finds a branch. Think of it as a revolving gallery of my whims.

    Today I’m showing you how to make your own shiny DIY ornaments using metal embossing. Don’t worry—it sounds way fancier than it is (spoiler: you’ll be using a ballpoint pen). The end result? Handmade ornaments that catch the light beautifully and bring a little beachy, earthy magic into your space, no matter the season.

    Supplies you’ll need:

    • Sea ornament templates (starfish + seashells)
    • Scissors
    • Masking tape
    • Craft foam sheet (9” x 12”)
    • Ballpoint pen
    • Aluminum craft metal foil roll (36-gauge)
    • Embossing tools (get creative: a ball stylus, a wooden clay tool, even an orange stick from your nail kit works!)
    • Ribbon (about ⅛-inch wide, cut into 5-inch strips—one per ornament)

    Safety note: aluminum edges can be sharp. Pop on a pair of gloves while you’re working to save your hands and keep things clean.

    Step 1: Prep your template

    Print out your seashell and starfish templates. Rough cut around each shape, leaving about a half-inch border of plain paper.

    Step 2: Cut your craft metal

    Snip a piece of aluminum foil from the roll that’s the same size as your craft foam sheet. Place it on top of the foam—this creates your “cushion” for embossing.

    Step 3: Tape & trace

    Tape the paper templates onto your craft metal. With your trusty ballpoint pen, trace the outlines of the shapes. Don’t press too hard—you want lines, not holes. (Flip it over as you go to check your progress.)

    Step 4: Add the fun details

    Now comes the satisfying part: embossing! Use whichever tool feels good in your hand and press in lines, dots, and textures to bring your seashells and starfish to life. Pro tip: flip the metal over to press designs in the opposite direction for extra depth.

    Step 5: Make a hole for hanging

    Each template has a little circle at the top—trace it, then press through with your pen tip to create a hanging hole. Wiggle the pen gently to widen it just enough for your ribbon.

    Step 6: Cut them out

    Carefully cut around each ornament shape. (Reminder: those edges can be sharp, so take your time and protect your hands!)

    Step 7: Ribbon & hang

    Thread your 5-inch ribbon through the hole, tie a knot, and ta-da—you’ve got a shiny, ocean-inspired ornament ready to sparkle on your tree.


    And there you have it—your very own set of handmade, nature-inspired ornaments. I love how they shimmer in the light and bring a touch of seaside magic indoors. The best part? They look just as good hanging with flower garlands and bird ornaments in spring as they do alongside twinkle lights in December.

  • How to Create a Hip Jackalope Display

    How to Create a Hip Jackalope Display

    This quirky little garden project began with a plain old cement rabbit from a local garden store—and ended in one of my favorite creations yet: a hip jackalope garden display that brings personality and humor to any outdoor space.

    Finished jackalope garden display with groovy glasses
    Groovy garden vibes with this jackalope statue 🕶️🦌

    Materials I Used

    • Concrete rabbit ornament – from local nursery
    • Apoxie Sculpt – for antlers
    • Acrylic paint – Blick & Michaels (colors used: warm brown, black, white)
    • 3D fabric paint – for texture details
    • Plastic novelty sunglasses – Etsy

    How to Build a Jackalope Garden Display (Step-by-Step)

    Step 1: Base Clean & Prime
    Clean your cement rabbit thoroughly. I used a stiff brush to remove dirt, then gave it a rinse and let it dry in the sun. A layer of white gesso helped the paint stick better.

    Step 2: Build the Antlers
    Using Apoxie Sculpt, I formed two simple antlers—kind of like big branching Y’s. Let them cure fully overnight, then lightly sanded the surface for better paint adhesion.

    Step 3: Paint & Detail
    Paint the rabbit in your desired color scheme. I went with desert tones—brown body, soft white chest, and black outlines for pop. Once dry, I added 3D puff paint for extra texture along the fur lines and ears.

    Step 4: Accessorize
    The finishing touch was a pair of novelty sunglasses I picked up from Etsy. I hot-glued these right onto the snout for max cool factor.

    Close-up of sunglasses on jackalope garden statue
    Shady and serene 🌵

    Why I Made This

    I was going through a tough time mentally when I began this project. Sculpting the antlers and painting slowly over a few days felt like a form of meditative healing. Giving a bunny antlers and calling it a jackalope somehow gave me a laugh I really needed—and now it brings that joy to everyone who sees it in my front yard.

    Final Thoughts

    If you’re looking to combine playfulness, art, and a little bit of desert folklore into one project, the jackalope garden display is it. Whether you’re gifting it, auctioning it, or just sprucing up your own yard, this DIY jackalope will absolutely steal the show.

    🦌 See the full Jackalope tutorial on Cowboy Kimono

    Connect with us:

    InstagramFacebookPinterestEtsy Shop

  • Paint a One-Of-A-Kind Sofa Table

    Paint a One-Of-A-Kind Sofa Table

    What is one way to hide a chaotic heap of twisted cords beneath a colossal TV screen? My solution includes strategically positioning a visual diversion: A custom console styled with arty pots on the bottom and a Nambé bowl on the top. This project is for a home with an interior that is a nice mix of Modern and Ethnic Chic. (What is Ethnic Chic?)

    Materials

    Materials needed for project: table, drawer knobs, paint color, and paint marker

    How To

    I’ve been pinning images of illustrated furniture for years. This project was my chance to dive in and give it a try. I found an unpainted sofa table that was the right size and style. Once the table was assembled, I removed the knobs, pulled out the drawer, and lightly sanded and primed all surfaces. Then I coated it with a few layers of satin latex paint and gave the drawer slides a very light coat to keep them in good sliding condition. I created an illustration the same dimensions as the drawer front using Adobe Illustrator. Next, I printed the illustration to size and it became my pattern. I traced the artwork by sandwiching a sheet of Saral Transfer paper between the print out and the drawer face. After the artwork was transferred to the drawer front, I drew on top of the traced image with a paint pen. NOTE: It was really important to let each layer dry the recommended amount of time, as well as, lightly sand between coats. After all the paint had cured for two weeks, I covered the table with several coats of poly acrylic (again – pay attention to drying times and sanding between coats). I rubbed a bar of soap on the drawer slides to improve their glide and attached the knobs. Kinda cool. Kinda artsy. I heart.

    painted console with southwestern roadrunner graphic

    Connect with us:

    InstagramFacebookPinterestEtsy Shop

  • Animated Chalk Art

    Animated Chalk Art

    Creating chalk drawings on dark paper is my current favorite drawing activity. For me, drawing the light instead of the shadows is a both a drawing technique and a formula for contentment. Converting these drawings into an animated video involved lots of watching and re-watching online animation tutorials. Here’s the basic process along with links to the videos I found most helpful:

    Preparation

    1. Create thumbnail sketches of actions to be animated.
    2. Work out the sequence of events.
    3. Write-out notes to the side of sketches to describe camera angles, zooming in or out, sound effects, etc…
    4. Photograph models or collect reference images for each major action. (I took photos of my son with a strong light coming from the bottom for this video)
    5. Modify the reference images in Photoshop as needed to unify lighting or amplify dramatic moments. Convert to black and white images.

    Drawing

    1. Print images at medium quality on copy paper (20#) to fit the size of your dark paper and scanner bed. (I use 8″x10″ black card stock which fits on my scanner bed)
    2. Transfer image to black paper, tracing only the very basic outlines and shapes.
    3. Draw the light values onto the dark paper using a white pastel pencil. Re-establish darkest values and lines with a kneaded eraser and/or pencil eraser.
    4. Scan each drawing and save as a jpeg. Improve contrast as needed in Photoshop.

    Animating

    1. Place jpeg images in a Photoshop document as layers.
    2. Select VIEW > Timeline to begin animating. Here are two video tutorials that I found very helpful:
    3. Save Timeline animations as mp4 clips.
    4. Create graphics in Powerpoint or Keynote.
    5. Combine animated clips, sound effects and music in iMovie.
    Final Chalk Art Animation by Marisa Mott
  • Red and Green Chile Hominy Casserole

    Red and Green Chile Hominy Casserole

    This was one of my Mom’s go-to-breakfast dishes. The original recipe had cream of mushroom soup and crushed Cornflakes which have been replaced with Bechamel sauce, mushrooms, and bread crumbs. The updated recipe is spiced up a bit with the addition of red and green chile.  Great served with fried eggs and bacon. 

  • 3 June Bugs You’ll Love Immediately

    3 June Bugs You’ll Love Immediately

    Still trying to decide if this paper craft is cuter than, happy as, or crazy as (a June bug). Either way, I’m ready to release this swarm of June bugs into my living room. The bright colored insects will serve as tree ornaments celebrating the holiday known as summer.

    Did you know?

    1. Real June bugs emerge from the soil at the end of spring or the beginning of the summer and are famous for bumping into porch lights and sneaking into houses. “(A June bug) Often tries to sneak into houses, either by flying right in when the door is open, or by hitching a ride on somebody’s clothes like a little ninja. Harmless to humans and cannot bite. Despite their name, they can come out as early as May.”URBAN DICTIONARY
    2. June bugs are related to scarabs from ancient Egyptian iconography.  TERMINIX FACT
    3. June bugs have a spiritual side. They  show how to balance and remain grounded. METAPHYSICALSCIENCES2012  Learn more about their SPIRITUAL MEANING

    Supplies

    • Download June Bug Template
    • Chenille Stems/Pipe Cleaners
    • Colored Construction or Cardstock Paper
    • Markers, Posca Paint Pens, Yarn, or Paint
    • Mod Podge
    • Colored Tissue Paper
    • Googly Eyes
    • Glue
    • Scotch Tape
    • Scissors

    Directions

    1. Print templates.
    2. Either trace bug pieces and leaves onto colored paper using transfer paper or pinch template and paper together and trim.
    3. Gently curl wings using a writing element with a curved exterior – like a marker. Hold the element like a wand, place it under a wing with your thumb on top of the wing and gently pull from the inside to the outside of the wing. Repeat for each wing.
    4. Decorate bug pieces as you choose. Some ideas: paint ombre gradients, draw tangle patterns with markers, layer colored tissue paper with Mod Podge, glue yarn in swirly patterns. Stuck? I got a lot of inspiration from my Pinterest collection of beautiful bug art: bug_inspiration
    5. Attach layers using scotch tape or glue. Layering formula for each bug is shown at the bottom of templates.
    6. Attach googly eyes. The moth doesn’t have room on its head for the eyes, but they can be glued to the wings!
    7. Cut and bend chenille stems to match the legs and antennae shown on each template. Tape in place on the back/undecorated side of the bugs.
    8. Fold leaves as shown on the bottom of each template. Veins can be added by drawing and applying gentle pressure on the back with a dull pencil.

    Once your paper June bugs are ready to swarm, you can strategically place them in houseplants, decorate a year-round holiday tree, give them to friends named, “June,” or use them to decorate the fridge door!

  • Denim Day

    Denim Day

    Wear denim April 28, 2021 and help raise awareness of rape and sexual assault. #DenimDay. The history behind Denim Day-

  • 5 Easy Ways Keep Your Old Denim Out of the Landfill

    5 Easy Ways Keep Your Old Denim Out of the Landfill

    Cotton’s Blue Jeans Go Green™ Program VIDEO

    Mother Earth is miffed at the apparel industry. It is the second largest polluter in the world, after the oil industry. Americans throw out an average of 80 pounds of clothing per year. Two River Times

    You know Cowboy Kimono is all about upcycling denim jackets, but did you know that Cotton’s Blue Jean’s Go Program gives you a discount if you turn in an old pair of jeans before buying a new one? Participating companies partner with Cotton to make it easy for you to recycle your denim.

    Boro Stitching

    Another trendy way to bring your jeans back from the dead is Boro. Patch the jeans you have using this bold stitching technique and fabric scraps. “Central to Boro is the concept of finding beauty in mending—that nothing should ever be wasted, and that imperfections have their own subtle and simple appeal.Indigoniche.com

    Spring cleaning your closet and donating clothes to thrift store.
    Trade your clothes for goods.

    Breathing life into someone else’s castoff doesn’t always mean a trip to the thrift store or dumpster diving. Online second-hand stores like ThredUP or Patagonia’s Worn Wear line (clothing made from recycled garments) let you shop without leaving home.

    Gently used clothing ready for trading.
    Trade your jeans locally with trading groups.
    Share creatively and tread lightly on the planet by trading your jeans for something else in a local BuyNothing group.
    Recycled denim jacket with painted red sleeves, plus floral elements.
    Rojos Brazos painted denim jacket by Cowboy Kimono

    Cowboy Kimono’s favorite way to extend the life of denim is to purchase recrafted or upcycled clothing and accessories. Most of my hand painted denim jackets start as thrift store purchases! Check out Patagonia’s Worn Wear selection of recycled denim Worn Wear by Patagonia